A simple Neuroprosthetic may be made with anything and everything!
Recently, I’ve been working with an 8th grade STEM teacher – Ms. Amy Farkas, from Riverview, MI – as she guides her students through a unit on prosthetics, neuroprosthetics, and other assistive technology. She began her unit having her students learn about hand articulation, tendons, and the median, ulnar, and radial nerves.
They built paper models to get started – Love it! In my mind, this is the kind of prototyping that makes the basics of this science accessible to literally everyone with access to arts ‘n crafts supplies.
As an “aspiring artist” myself, I thought I’d take a crack at developing a similar articulated hand in our lab, and then demonstrate how you can take it one step further and transform it into a functioning Neuroprosthetic!
My supplies… including a Muscle SpikerShield and a Servo Motor – not pictured: Rubber Bands.
Taking this picture with my phone, trying to keep my left arm flat on the table, while getting my camera as high up as possible… was kind of awkward.
The green pulleys represent the fingers that the Median nerve controls, the red taped pulleys are controlled by the Ulnar nerve.
Also, I opted to have each finger be individually controlled, instead of tying them all together and having one thread escaping the wrist (like Ms. Farkas’s students did).
The rubber bands help act as an opposing force, so when you flex to close the fingers, then relax, they will open back up.
For completion’s sake, I added controls for the Radial nerve to pull back on the hand and wrist.
Time to thread my tendons!
I hot glued my tendons in at the fingertips, leaving the rest of the pulleys as clean, smooth control channels.
Radial nerve again! Now we have a finished, articulated hand. By pulling any individual tendon, I can manipulate the fingers and simulate different hand movements (including raising and lowering the wrist by pulling on the radial nerve!)
Now here’s the shift to Neuroscience: I taped a pencil onto a servo motor, which will be controlled by the Muscle SpikerShield: This kit can record the electricity from your nervous system and then transform it into a signal that we can use to control machines! This kit will control the servo motor, pulling the arm, which will act as a lever, pulling on the hand’s tendons, causing the hand to close when I flex and close my hand!
Success! It might not be the prettiest model hand out there, but I made it and it works! What do you think – should we write this up into an experiment on our website?
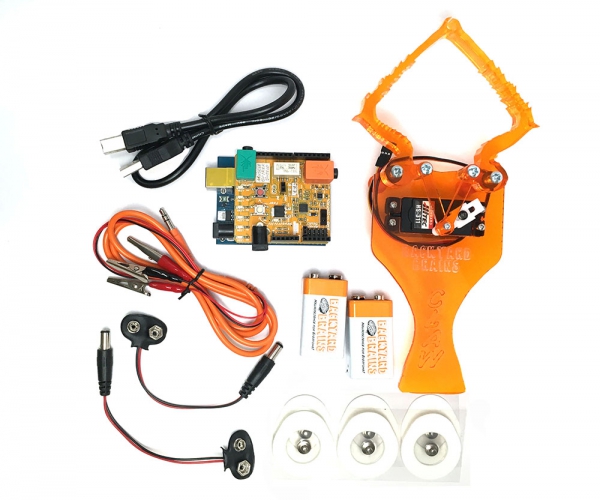
With The Claw kit and the included Muscle SpikerShield we can create simple models, prosthetics, and learn about Brain-Machine Interfaces. We can even use it to control more complex devices, computer programs, etc., but that’s getting into lesson 2 territory!
A few things I learned from the process:
Yarn, thread, or fishing line would have worked better than the Clothesline cord I found at the grocery store… It was a bit heavy and the Servo Motor could barely pull it, but sometimes you’re limited to what you can find in Aisle 10.
I should have hot glued the rubber bands on first while I could still press the hand flat against the table. Once I had the straws taped on, it was harder to glue on the rubber bands.
The radial nerve was a cool idea, and I’d like to set up a 3-channel model to control the Ulnar, Median, and Radial nerves separately, but this model worked by taping the hand down to the table… I’ll have to come up with another way to build it that will allow for some more freedom of movement.
Student Projects
I’m pretty late to the party – check out some of these great student examples (they did it way better than me!)
Build Your Own Neuroprosthetics
Want to build your own device? Our The Claw bundle is a great way to get started. It features the Muscle SpikerShield, which is the device which I used above to control the model hand with my brain. It also comes with a ready-made Neuroprosthetic! Just plug in The Claw and you can control it with your brain right out of the box!