Backyard Brains Logo

Neuroscience for Everyone!

+1 (855) GET-SPIKES (855-438-7745)


items ()

The Electrophysiology of Dragonflies

About Me

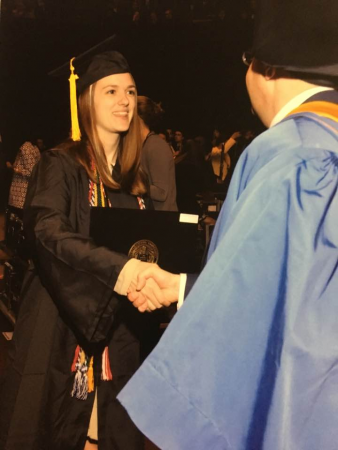
Hi everyone, I’m Jaimie. I just graduated from Boston’s Northeastern University in Behavioral Neuroscience. My academic background is in biology, but I picked up some engineering and coding skills through previous lab research. Originally I’m from the Chicago area, so I’m pretty familiar with the Midwest atmosphere, though I had never been to Ann Arbor before this internship. I brought my ferret, Taz, with me too. I’m really enjoying working at Backyard Brains so far; my project has been a lot of fun, and my coworkers are great to hang out with! I haven’t done much exploring of the city yet, although I went with Joud, Nathan, and Ilya to the University of Michigan Museum of Art. There were some really cool performance pieces there, so if you’re in the area, you should check it out!

Taz! He spends most of the day sleeping in his hammock… but when he’s awake, it’s non-stop playtime

My Project

I am working on a continuation of Patricia Aguilar’s dragonfly investigation from last summer. Dragonflies have very complex flight patterns, as each wing can move individually (rather than as a pair with its contralateral counterpart). Further, they are able to intercept their prey mid-flight with 95% accuracy. This leads to some questions about how their behavior is possible. Essentially, dragonflies’ neurons in their eyes connect to their wings in a reflex circuit, rather than processing the visual information first. This allows them to make sharp turning maneuvers very quickly in order to follow and catch their prey. These important neurons, 8 on each side, lie in tracts along the neck of the dragonfly. They are called target-selective descending neurons (TSDNs). My primary aim is to record from these neurons to identify the visual receptive fields of each one, similar to the study performed by Paloma Gonzalez-Bellido et al, here. Right now, I am in the process of weighing the pros and cons of various visual stimuli and experimental methods done by Robert Olberg (an author on the linked paper), though I will likely be doing something similar to Patricia’s laser rig. Stay tuned for updates on this.

A closer look at Dragonfly nerve bundles

Catching Dragonflies

Last Thursday, I spent the day in the arboretum trying to catch dragonflies. I learned quite a few lessons about what to wear (dress to prevent bites, not stay cool!) and how to find them. Dragonflies eat mosquitos, midges, and almost any other smaller insect they can find. Mosquitos lay their eggs in still water, so dragonflies tend to be found near their food sources. The banks of a river or a marsh are ideal places to look. I was using a net and alternated between swinging the net like a bat (Swing method) and going from above to trap it to the ground (Pancake method). My end result was a catch of 3 damselflies and 1 unknown insect (possibly a wasp?). Note that the pictures are after anesthetizing the insects in the refrigerator overnight. Damselflies are tricky in that they look and act similarly to dragonflies, but upon closer inspection, there are slight differences; they have thinner bodies compared to dragonflies, and instead of displaying their wings when perched at rest, they keep them together. I recognized that these were damselflies before catching them, and though I can’t technically use the data I get from these bugs, I can practice recording from their neurons and improve on my surgery setup. I’ll be sure to show the final setup and materials I used when I have a successful recording.

Damselfly

???? #Whatsthisbug, some kind of wasp?

Quick Update: I tested the recording rig on a Damselfly! Now to catch some Dragonflies…

Testing The Recording Rig

I’d love to hear from you if you have any suggestions or inquiries. Thanks for reading!


[Summer’16 Internship] The Dragonfly: Nature’s Guided Missile

The dragonfly can capture its prey mid-air with a 95% accuracy rate. What biological equipment does the dragonfly have that allows it to do this amazing feat? To examine this very question, I will be replicating Paloma T. Gonzalez-Bellido’s 2012 PNAS paper using DIY open source tools. Gonzalez-Bellido found that there are neurons that run from the dragonfly’s compound eyes to its wings that help the dragonfly track and catch its prey with such accuracy. My version of this experiment will control a laser using a laser-light show set up (instead of a expensive custom-made projector) that shines a laser dot (representing a fly) as the stimulus. I will simultaneously be recording on open source bio-amplifiers the activity from these target selective neurons as the dragonflies watches its “prey” move across a screen.

The goal of this experiment is to provide a way for amateur scientists to replicate professional research.

Background:

The dragonfly is nature’s guided missile. They can use their 360° visual span to swoop down and devour their prey mid-flight with a 95% kill rate. They can individually manipulate the trajectory of each wing to switch directions rapidly in mid-flight. Ant-Man? Spider-Man? They really should have Dragonfly-Man. To illustrate this insect’s abilities, I invite you to google “dragonfly catching fly slow motion video,” or something of that sort. You will be amazed.

Despite their stunning predatory accuracy, dragonflies are deceptively simple creatures. 300 million years ago, they were still buzzing around like little killer drones. The source of the accuracy of dragonflies is also deceptively simple. Eight pairs of neurons (called TSDNs for target selective descending neurons) that run from the dragonfly’s visual system to their flight center, help them encode the direction of their target (their prey) and track it with such incredible accuracy. Through examination of this surprisingly simple yet adept insect, it is my hope that my research can be used for the purpose of furthering technology, such as building a faster, more accurate helicopter, and education, by providing a cheap, DIY method of producing a professional experiment.

In my project, I will be replicating and extending Paloma Gonzalez- Bellido’s 2012 paper, “Eight pairs of descending visual neurons in the dragonfly give wing motor centers accurate population vector of prey direction.” This paper studies the relationship between eight pairs of neurons and the dragonfly’s predatory abilities. The results of the paper show that these neurons, aptly named the target-selective descending neurons (TSDNs), encode a population vector that is strongly correlated with the position of the target (the fly). This means that these eight pairs of neurons are direction-oriented, or that they have a preferred direction and show more activity when their direction is favored.

The Original Set-Up:

As previously mentioned, this project will be replicating a academic paper, “Eight pairs of descending visual in the dragonfly give wing motor centers accurate population vector of prey direction.” In this paper, Gonzalez-Bellido used a modified projector to shine a black dot (representing prey) on a curved screen and measured the neural activity of the dragonfly. Below is Gonzalez- Bellido’s set up:

The set-up in the original 2012 paper

My Set-Up:

In my set up I will use a laser light show system instead of an expensive modified projector. The laser show is very replicable because it is cheap and made with materials that most makers have around. My laser light show includes two servos and an Arduino Uno. These servos have mirrors attached to them. As different voltages pass through these galvos, the mirror will change position. The two servos, one moving in the x direction and one in the y, will change the position of the laser. The laser and the two servos are connected to an Arduino Uno, making the position of the laser both reliably and easily manipulated through Arduino software. Furthermore, a Spikerbox (Backyard Brains) is connected to two electrodes (one in the dragonfly’s abdomen and acting as a ground, and one in the TSDN) to measure the neural activity of the target neurons, and displaying it on an laptop. This set-up is pictured below:

My modified set-up

If all works, the essential goal of my experiment is to provide a way for anyone to replicate professional laboratory neuroscience!

FILE AND LOGS

First draft for the final laser show: servo_laser_draft1.ino

Below are the complete instructions for this experiment, if you want to see the whole process (every step and attempt to achieve this project) you can check out the following logs:

EXPERIMENT

Essential materials:

(from top left to bottom right)

1. Spikerbox pro (with appropriate cord to plug into laptop and electrodes)

2. breadboard

3. Arduino Uno and jumper cables/ wires

4. Mirrors (two)

5. servos (two)

6 USB chord (for Arduino to laptop)

7. laser (not pictured)


Non-essential materials:

1. materials for stand and base for laser light show (I used wood and acrylic)

2. supports for mirror (I used wooden sticks and popsicle sticks)

3. microscope (not needed, just helpful)

4. insect wax and popsicle sticks

5. thread and silly putty (for the neural recordings)

6. paper (for the curved screen)

7. solder and soldering iron

optional: Neuron spikerbox (pictured above)

Set up the laser light show:

Gather the following materials for the next couple of steps:

1. servos (two)

2. mirrors (two)

3. jumper cables

4. breadboard

5. Arduino

In this step we will connect the servos to the Arduino so that we can control their movement through code.

This fritz shows how one servo is hooked up, do the same for the other servo.

These are the servos I used:

Each servo has a brown, yellow and a red cable. The brown and red are for ground and power, respectively, and the yellow is for the signal. The yellow can be plugged into the Arduino pin 10. Do the same for the other servo, except plug the yellow into pin 11.

Try this test code:

include <Servo.h>
  
  const int servo = 10;       // The servo motor pin
  const int servo2 = 11;
 
  Servo myservo;  // create servo object to control a servo
  Servo myservo2;

  
  void setup() {
  
    // Servo  
  
    myservo.attach(servo);  // attaches the servo to the servo pin
    myservo2.attach(servo2);
  
  }
  
  
  void loop(){
    

      for(servoAngle = 0; servoAngle < 20; servoAngle++)  //move the micro servo from 0 degrees to 20 degrees
    {    
     
      myservo.write(servoAngle); 
      myservo2.write(servoAngle);
      delay(50); 
      
    }
    
    
    digitalWrite(laserPin, LOW); // turn the laser off
    myservo.write(0); // return to zero degrees
    myservo2.write(0);
  
    delay(1000); // pause for one second
    
}

Next step is to glue the mirrors onto the servos. I used wooden sticks and mirror pieces that I cut from a large hand mirror.

Try to get the mirrors flush on the wooden sticks.

Set up the laser. Take out the back of the lasers and remove the batteries. Inside should be a spring. Attach one aligator clip on the spring (ground), and one on the outside metal (positive). Connect the ground to ground, and the power to the 12 pin on the Arduino.

Test with this test code:

#include <Servo.h>
  
  const int servo = 10;       // The servo motor pin
  const int servo2 = 11;
  int laserPin = 12;
  Servo myservo;  // create servo object to control a servo
  Servo myservo2;
  int servoAngle = 0;   // servo position in degrees
    int servoAngle2 = 0;   // servo position in degrees
  
  void setup() {
  
    // Servo  
  pinMode(laserPin, OUTPUT); // set up the laser pin
  
    myservo.attach(servo);  // attaches the servo to the servo pin
    myservo2.attach(servo2);
 
  }
  
  
  void loop(){
    
      digitalWrite(laserPin, HIGH); // turns the laser on
      for(servoAngle = 0; servoAngle < 20; servoAngle++)  //move the micro servo from 0 degrees to 20 degrees
    {    
     
      myservo.write(servoAngle); 
      myservo2.write(servoAngle);
      delay(50); 
      
    }
    
    
    digitalWrite(laserPin, LOW); // turn the laser off
    myservo.write(0); // return to zero degrees
    myservo2.write(0);
  
    delay(1000); // pause for one second
    
}

Create a screen. I made mine out of paper, some more wooden sticks and a little bit of string. Do not glue the screen down quite yet. Position the servos (with mirrors attached to them), the laser and the screen so that laser shines off of both servos, and the beam hits all parts of the screen. This is a very difficult part of the experiment and needs patience — but you will feel so accomplished when it actually works!

Once you have the laser light show set up, then you can work on recording the events. Use a Spikerbox pro (a product from Backyard Brains) to do this.

Spikerbox pro:

Connect the Spikerbox to your laptop using the appropriate cable (green cable in photo) and open Spikerecorder (a free app by Backyard Brains). Next to where you plug the cable in to the Spikerecorder are eight holes. Using a multimeter, find which is Ground, and which are events. The events, when connected to power, will show up as a numbered bar on the Spikerecorder screen. Solder wires to ground, event 1 and event 2.

Disconnect the laser power and ground and place on breadboard. Connect the Spikerbox like below:

Once you have everything connected, test with code.

The way to turn the laser on:

digitalWrite(laserPin, HIGH);

if you have set up the laserPin to be whatever pin you plugged the laser power into (for me it is 12).

Since we want double events, connect one end of the resistor to a pin in the Arduino, and the other side of the resistor to the Spikerbox pro event 2 (not pictured in fritz).

then add the code:

digitalWrite(laserPinOff, HIGH);

every time the laser is off, and write LOW every time it is on.

Now you have the entire laser set up together!

Now it is time for the neural recordings. For now, we will test without the laser set-up, just to ensure that we can locate the TSDN neurons. First, catch the dragonflies! They love the vegetation by large bodies of water. I found a lot by a field near a river. Take a butterfly net and cage and catch as many as you can. My suggestion is to track them to where they are perching, and they try to net them from behind. Dragonflies are hard to catch when they are flying.

After you have caught the dragonflies, place them in the refrigerator. This will anesthetize them.

Get these materials ready:

1. Neuron Spikerbox (optional)

2. Spikerbox pro, cable and electrodes

3. popsicle stick

4. microscope (optional but helpful)

5. silly putty

6. thread

7. micromanipulator (optional but helpful)

Anesthetize the dragonflies and heat up insect wax. When it is melted, place on popsicle stick and then place anesthetized dragonfly onto the popsicle stick. It’s dorsal side should be on the stick and its wings should be free from the putty.

Set up the dragonfly like above.

Though I have the electrodes plugged into the neuron Spikerbox in this picture, in the final version I used a Spikerbox pro so that I can also record double events. I just use the neuron Spikerbox as a stand to put the dragonfly on (this is why it is optional.)

Using a microscope, locate the TSDN and pierce with an electrode.

The micro manipulator (the orange 3d printing manipulator in the picture before the one above) helps keep this electrode in place. Above is a picture of the anesthetized dragonfly under the microscope while I place the electrode in the TSDN.

The TSDN are located here

Turn on the Spikerbox, you can either plug the Spikerbox into the computer or just listen with a radiohead speaker. You will hear a electronic tap- these are the action potentials firing! Wave a piece of paper with a black dot on it or make another movement and you should hear these electronic taps increase in frequency in response to your movement!

Now, test all together! This is the next step for me too, along with writing code that calculates where the laser beam is as a function of time. But once these two steps are completed, you can calculate and hopefully affirm Paloma T. Gonzalez Bellido’s population vectors for each of the TSDNs!

By Patricia Aguilar


[Summer’16 Internship] The Dragonfly: Manipulating the code for the laser set-up

In order to replicate Paloma Gonzalez-Bellido’s experiment, I need to be able to manipulate the direction and position of the laser beam. In Paloma Gonzalez- Bellido’s 2012 paper she publish these results:

Gonzalez-Bellido, P. T., H. Peng, J. Yang, A. P. Georgopoulos, and R. M. Olberg. “Cozzarelli Prize Winner: Eight Pairs of Descending Visual Neurons in the Dragonfly Give Wing Motor Centers Accurate Population Vector of Prey Direction.” Proceedings of the National Academy of Sciences 110.2 (2012): 696-701. Web.

The diagrams on the left column plot the preferred direction of a certain neuron (labeled DIT.., MD… etc). Imagine that in the centers of the circles are the dragonflies, and that each color represents a position the target could be moving in. The red arrow points to the position that is preferred. The next column represents the flattened out screen. Each colored dot represents a pixel that the target has either started or passed through, and each color represents the direction. By looking at the left column, we can determine the direction the target was moving. The last column represents the firing rate- yellow being the greatest and black being the weakest.

I wrote a first draft of code, using Arduino, to mimic the experiment. Using the data collected about the preferred direction and the preferred starting location of the target, I designed code that would move the laser beam from each of the preferred starting locations for each of the neurons and travel in each of the neurons preferred directions.

For example, I wrote code for the neuron MDT3:

#include <Servo.h>
  
  const int servo = 10;       // The servo motor pin
  const int servo2 = 11;
  int laserPin = 12;
  Servo myservo;  // create servo object to control a servo
  Servo myservo2;
  int servoAngle= 0;
  
  void setup() {
  
    // Servo  
  pinMode(laserPin, OUTPUT); // set up the laser pin
  
    myservo.attach(servo);  // X servo
    myservo2.attach(servo2); // Y servo
  

  }
  
  
  void loop(){
    
    for (int i = 0; i < 11; i ++)
    {
    
    for (int j =0; j < 5; j ++)
    {
      
    digitalWrite(laserPin, LOW);
     
      myservo.write(30); // X servo starting point
      myservo2.write(60 - i*(2.5)); // Y starting point - moves with i
      delay(100); // 100 millisecond delay
      digitalWrite(laserPin, HIGH); // turns the laser on
      for(servoAngle = 30; servoAngle < 55 ; servoAngle ++)
    {    
      myservo.write(servoAngle); // X servo moves

       delay(50);
    
    }
    }
    
    delay(1000);
    }
  
  
  }
 

The result is:

Here is the first draft of the code for the final testing:

#include <Servo.h>
  
  const int servo = 10;       // The servo motor pin
  const int servo2 = 11;
  int laserPin = 12;
  Servo myservo;  // create servo object to control a servo
  Servo myservo2;
  int servoAngle=0;
  
  
  void setup() {
  
    // Servo  
  pinMode(laserPin, OUTPUT); // set up the laser pin
  
    myservo.attach(servo);  // attaches the servo to the servo pin
    myservo2.attach(servo2);
  
    // Inizialize Serial

  }
  
  void loop(){
    
    //DIT1
    
    for (int i = 8; i < 11; i ++)
    {
    
    for (int j = 0; j < 5; j ++)
    {
     
     
      myservo.write(55);
      myservo2.write(60 - i*(2.5));
      delay(100);
      digitalWrite(laserPin, HIGH); // turns the laser on
      for(servoAngle = 30; servoAngle >10 ; servoAngle --)
    {    
      myservo.write(servoAngle);

       delay(50);
    
    }
    digitalWrite(laserPin, LOW);
    delay(2000);
    }
    delay(10000);
    }
    
    //DIT3
        for (int i = 0; i < 11; i ++)
    {
    
    for (int j =0; j <5; j ++)
    {


      myservo.write(55);
      myservo2.write(60 - i*(2.5));
      delay(100);
      digitalWrite(laserPin, HIGH); // turns the laser on
      for(servoAngle = 45; servoAngle >20 ; servoAngle --)
    {    
      myservo.write(servoAngle);

       delay(50);
    
    }
       digitalWrite(laserPin, LOW);
    delay(2000);
    }

    
    delay(10000);
    }
    
    //MDT1
        for (int i = 0; i < 11; i ++)
    {
    
    for (int j =0; j <5; j ++)
    {


      myservo.write(55);
      myservo2.write(60 - i*(2.5));
      delay(100);
      digitalWrite(laserPin, HIGH); // turns the laser on
      for(servoAngle = 55; servoAngle >20 ; servoAngle --)
    {    
      myservo.write(servoAngle);

       delay(50);
    
    }
       digitalWrite(laserPin, LOW);
    delay(2000);
    }

    
    delay(10000);
    }
    //MDT5
    
        
    for (int i = 0; i < 11; i ++)
    {
    
    for (int j =0; j <5; j ++)
    {


      myservo.write(20);
      myservo2.write(60 - i*(2.5));
      delay(100);
      digitalWrite(laserPin, HIGH); // turns the laser on
      for(servoAngle = 20; servoAngle < 55 ; servoAngle ++)
    {    
      myservo.write(servoAngle);

       delay(50);
        
    }
       digitalWrite(laserPin, LOW);
    delay(2000);
    }
    
    delay(10000);
    }
    //MDT3
        for (int i = 0; i < 11; i ++)
    {
    
    for (int j =0; j <5; j ++)
    {
      
      myservo.write(30);
      myservo2.write(60 - i*(2.5));
      delay(100);
      digitalWrite(laserPin, HIGH); // turns the laser on
      for(servoAngle = 30; servoAngle < 55 ; servoAngle ++)
    {    
      myservo.write(servoAngle);

       delay(50);
    
    }
       digitalWrite(laserPin, LOW);
    delay(2000);
    }
    
    delay(10000);
    }
    
    //DIT2
        
    for (int i = 0; i < 11; i ++)
    {
    
    for (int j =0; j <5; j ++)
    {
      
      myservo.write(30);
      myservo2.write(60 - i*(2.5));
      delay(100);
      digitalWrite(laserPin, HIGH); // turns the laser on
      for(servoAngle = 30; servoAngle < 55 ; servoAngle ++)
    {    
      myservo.write(servoAngle);

       delay(50);
    
    }
       digitalWrite(laserPin, LOW);
    delay(2000);
    }
    
    delay(10000);
    }
    
    //MDT2
        
    for (int i = 0; i < 11; i ++)
    {
    
    for (int j =0; j <5; j ++)
    {

      myservo.write(30);
      myservo2.write(60 - i*(2.5));
      delay(100);
      digitalWrite(laserPin, HIGH); // turns the laser on
      for(servoAngle = 30; servoAngle < 45 ; servoAngle ++)
    {    
      myservo.write(servoAngle);

       delay(50);
    
    }
       digitalWrite(laserPin, LOW);
    delay(2000);
    }

    
    delay(10000);
    }
    
    //MDT4
        
    for (int i = 0; i < 11; i ++)
    {
    
    for (int j =0; j <5; j ++)
    {
      
      myservo.write(50);
      myservo2.write(60 - i*(2.5));
      delay(100);
      digitalWrite(laserPin, HIGH); // turns the laser on
      for(servoAngle = 50; servoAngle > 20 ; servoAngle --)
    {    
      myservo.write(servoAngle);

       delay(50);
    
    }
       digitalWrite(laserPin, LOW);
    delay(2000);
    }

    
    delay(10000);
    
    }
  }

By Patricia Aguilar